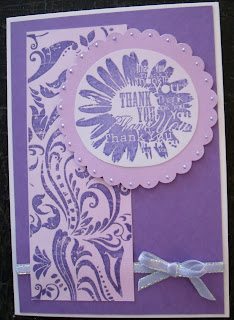
This was my first experiment:
I had a set of silhouette stamps which I hadn't used yet. The thank you was stamped with purple ink and then embossed with clear powder. It doesn't show much in the picture but it gives a shiny, almost wet look to it. It was then cut out and mounted onto a scallop circle and perfect pearl drops were added to each scallop. The flourish at the side was done in the same way onto a pink paper. It's a very simple card and I took the ideas and built on them for the next card:
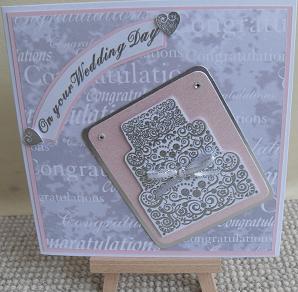
The next card also builds on an idea that I have tried before: a silver embossed wedding cake.
Previously I had embossed the cake on it's own and mounted onto a white card blank, but it's not been that popular, so I have added to the design. I mounted it onto pink and then silver card and placed on a square card blank which had been covered with pink card and then silver congratulations paper. I embossed the sentiment in the same way - with the silver embossing powder as well as the two hearts. I am very pleased with the result and hopefully this one will sell slightly better than they last version.
The next card is my favourite. I read somewhere that someone had tried embossing peel off's. I had this peel off in my stock and hadn't used it but felt that it was in need of some glitter embossing powder, so that's what I did:
Again, it doesn't show up very well in the picture, but certain areas of the peel off have been embossed with sparkly powder. The same was done with the butterflies and they were then cut out and stuck onto the card. The wings have been slightly bent to add to the 3D look. The flourishes in the corners were stamped and embossed with white embossing powder as well as the sentiment.
And then there is this one, which again is very simple but it looks so effective and pretty.
The topper and sentiment were stamped with blue ink and embossed with clear embossing powder. The border along the bottom was stamped with blue ink and embossed with the sparkly powder. The mirri card which has been used for mounting the topper and sentiment, and for the flourishes, adds a certain sophisticated look to the card.
I hope you have enjoyed looking at my cards as much as I have enjoyed making them, and I hope that they will bring inspiration to any who want to try heat embossing for themselves.
Claire


No comments:
Post a Comment